
Attic Insulation and Air Sealing for Energy Savings
Discover how attic insulation and air sealing for energy savings can cut your bills. Call (833)-439-3727 to find trusted local contractors and get free quotes.

By Aaron Turner
Learn more about Insulation Installation or Upgrade for guides, costs, and what to expect.
Compare Insulation Installation or Upgrade Pros Near You

Enter your ZIP code to compare top-rated local professionals and request free quotes.
Your attic is one of the most overlooked opportunities to cut energy bills and improve home comfort. In fact, the U.S. Department of Energy estimates that heating and cooling account for over half of a typical home's energy use, and poor attic insulation and air sealing can waste a significant portion of that money. If you have ever felt a draft near your ceilings, noticed uneven room temperatures, or cringed at summer cooling costs, the culprit may be a leaky, under-insulated attic. This guide explains how attic insulation and air sealing for energy savings work together, what R-value you need, which materials make sense, and how to verify that your contractor did the job right.
Why Attic Insulation and Air Sealing Matter for Energy Savings
Heat naturally flows from warmer to cooler areas. In winter, warm air from your living space rises into the attic and escapes through gaps around pipes, recessed lights, and top plates. In summer, the scorching attic temperature radiates down into your home, forcing your air conditioner to work harder. Insulation slows conductive heat flow, but it does nothing to stop air leaks. Air sealing closes those leaks, and together they form a system that keeps your conditioned air where it belongs.
Many homeowners assume that adding more insulation alone will solve their problems. But if you pile insulation over a leaky ceiling, air still moves through it, and the insulation performs at a fraction of its rated value. The DOE recommends air sealing first, then insulating to the proper R-value for your climate zone. This order matters because sealing is easier when you can see the attic floor, and it ensures every dollar spent on insulation delivers maximum return.
Beyond energy savings, proper attic insulation and air sealing improve indoor comfort, reduce outside noise, and help prevent ice dams in cold climates by keeping the roof deck uniformly cold. They also reduce the risk of moisture problems by limiting warm, moist air from entering the attic in winter.
Recommended R-Values by Climate Zone
R-value measures thermal resistance: the higher the number, the better the insulation. The DOE publishes recommended attic R-values based on climate zones. Most of the U.S. falls into zones 1 through 8, with zone 1 being the hottest (southern Florida, Hawaii) and zone 8 the coldest (northern Alaska).
For existing homes, the DOE suggests the following attic insulation levels:
- Zones 1 to 4 (warm to mixed): R-30 to R-60, with R-38 to R-49 being common targets.
- Zones 5 to 8 (cool to cold): R-49 to R-60, with R-60 recommended in the coldest areas.
Your local building department can confirm the exact requirement for your area, and many utilities publish climate-specific recommendations. If your attic currently has only a few inches of old insulation, you likely need to add more. A qualified contractor will measure existing insulation depth and calculate the added R-value needed to reach the target.
Air Sealing Before Insulation: Why Order Matters
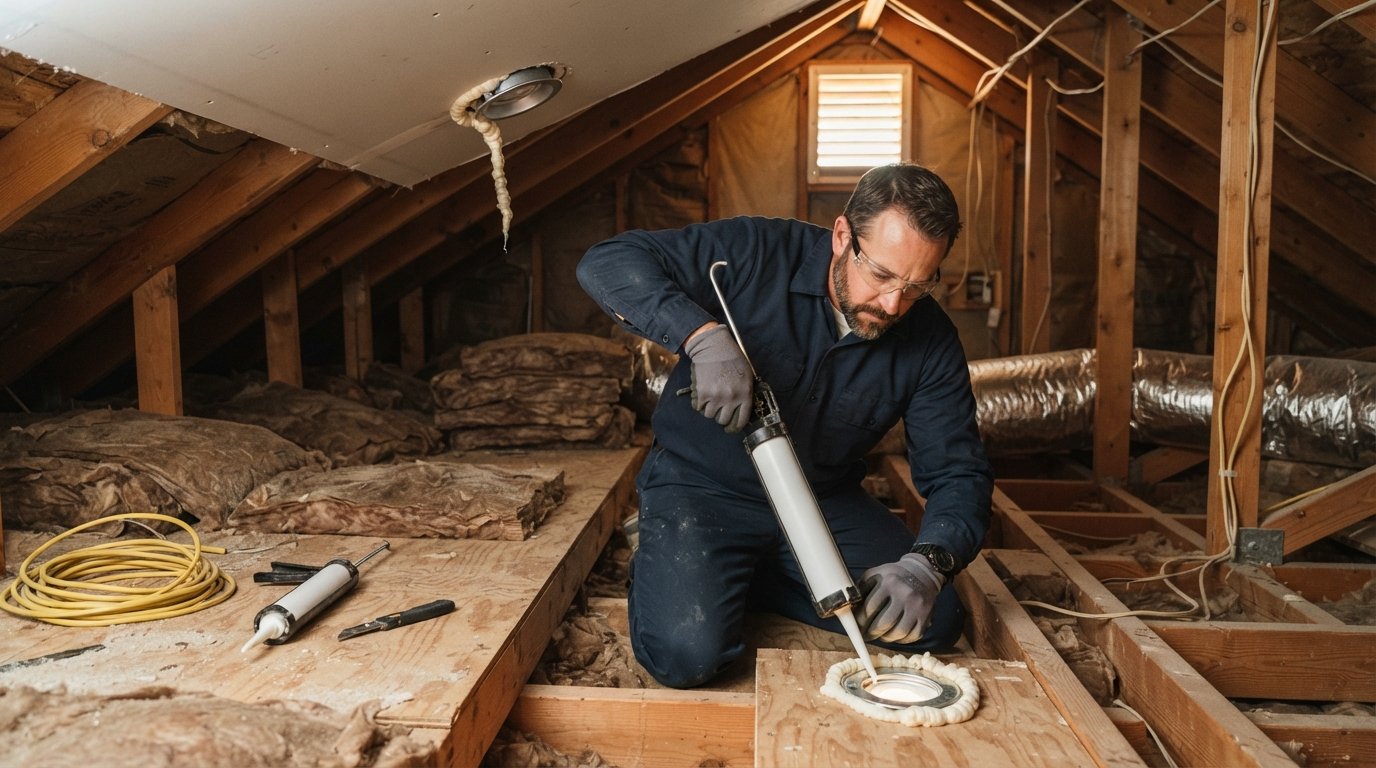
Air sealing is the process of closing holes and gaps that allow air to move between your living space and the attic. Common leak points include:
- Wire and plumbing penetrations through the attic floor
- Recessed light fixtures (unless rated IC, meaning insulation contact)
- Top plates where walls meet the attic floor
- Attic hatches and pull-down stairs
- Chimney and flue chases
- Dropped soffits and ductwork penetrations
Sealing these leaks with caulk, spray foam, or rigid materials prevents warm air from escaping and cold air from entering. It also stops moisture-laden air from reaching the cold roof deck, where it can condense and cause mold or rot.
If you insulate first, you bury the leaks and make sealing far more difficult and expensive. That is why energy auditors and Building Performance Institute (BPI) certified professionals always recommend air sealing as the first step. After sealing, you can add insulation with confidence that it will perform as intended.
When you are ready to hire a professional for this work, you can use a resource like contractors for energy-saving home improvements to find pre-vetted insulation and air sealing specialists in your area.
Blown-In vs. Batt vs. Spray Foam: Tradeoffs
There are three main insulation materials used in attics, each with distinct advantages and limitations.
Blown-In Insulation
Blown-in fiberglass or cellulose is the most common choice for retrofitting existing attics. It is installed with a machine that fluffs the material and blows it into place, filling irregular spaces and covering existing joists. Blown-in insulation is cost-effective, fast to install, and achieves a seamless blanket. Cellulose, made from recycled paper, has slightly higher R-value per inch than fiberglass and is treated for fire resistance. The main drawback is that it can settle over time, so installers must account for settling when calculating depth.
Batt Insulation
Batt insulation comes in pre-cut rolls or panels of fiberglass or mineral wool. It is a good choice for new construction or attics with standard joist spacing, but it is less effective at filling odd-shaped cavities and can leave gaps if not installed perfectly. For retrofits, batts are often used in combination with blown-in insulation to reach higher R-values. Mineral wool offers better fire resistance and sound dampening than fiberglass.
Spray Foam
Spray foam insulation expands to fill cracks and gaps, providing both insulation and air sealing in one step. It is available as open-cell (lower density, lower R-value per inch, vapor permeable) or closed-cell (higher density, higher R-value, vapor barrier). Spray foam is excellent for hard-to-reach areas like rim joists and sloped ceilings, but it costs significantly more than blown-in or batt. It also requires a skilled installer to avoid over-application or off-gassing issues.
For most attic retrofits, a combination approach works best: air seal with caulk and foam, then blow in cellulose or fiberglass to reach the target R-value. Spray foam may be used selectively for difficult areas. Your contractor should recommend the material that balances performance, cost, and your home's specific conditions.
Rebates and Tax Credits for Insulation Work
Insulation upgrades often qualify for financial incentives that can offset a significant portion of the cost. The Inflation Reduction Act (IRA) introduced expanded tax credits and rebates for energy-efficient home improvements, including insulation and air sealing.
Key programs to explore:
- Federal Energy Efficient Home Improvement Credit: Homeowners can claim a tax credit of up to 30% of the cost of qualifying insulation and air sealing materials, up to $1,200 per year. The credit is available through 2032.
- Utility rebates: Many electric and gas utilities offer rebates for attic insulation and air sealing, often based on the R-value added or the measured energy savings.
- State and local programs: Some states and municipalities offer additional grants or low-interest financing for energy upgrades.
- Weatherization Assistance Program: Low-income households may qualify for free weatherization services through this federal program.
To claim the federal credit, you must use products that meet the DOE's criteria, and you will need a manufacturer's certification statement. Keep your receipts and contractor invoices. Rebates often require pre-approval and a post-installation inspection, so check the program rules before work begins.
Verifying Contractor Workmanship with a Post-Install Inspection
Even the best materials underperform if installed poorly. A post-installation inspection confirms that air sealing was done thoroughly and insulation was installed to the correct depth and density. Here is what to check:
- Visual inspection: Look for consistent insulation depth, no gaps or voids, and properly sealed penetrations. The contractor should provide a diagram or photos of the completed work.
- Blower door test: A blower door test measures whole-house air leakage before and after air sealing. A qualified auditor can verify that leakage has been reduced to the target level.
- Thermal imaging: Infrared cameras can reveal missed spots or compressed insulation that is not visible to the naked eye.
- Documentation: Ask for a written report that includes the R-value achieved, the air sealing methods used, and any test results.
Before hiring, verify that your contractor is licensed, insured, and experienced with attic insulation and air sealing. You can find pre-vetted professionals through platforms like PlanRemodel, which connects homeowners with qualified contractors across the United States. Always get multiple quotes and ask for references from similar projects.
Proper attic insulation and air sealing for energy savings is one of the highest-return home improvements you can make. By understanding R-values, prioritizing air sealing, choosing the right materials, and verifying workmanship, you can enjoy a more comfortable home and lower energy bills for years to come.
Ready to start saving? Contact us at (833)-439-3727 to connect with trusted local contractors and get free quotes for your attic insulation and air sealing project.
Learn more about Insulation Installation or Upgrade for guides, costs, and what to expect.
Compare Insulation Installation or Upgrade Pros Near You
Enter your ZIP code to compare top-rated local professionals and request free quotes.