
Summer Deck Maintenance and Repair Tips for Homeowners
Keep your deck safe and beautiful all season with these summer deck maintenance and repair tips, from inspection to cleaning and finishing.
By Danica Leslie
Learn more about Deck or Porch Repair for guides, costs, and what to expect.
Compare Deck or Porch Repair Pros Near You

Enter your ZIP code to compare top-rated local professionals and request free quotes.
Summer is here, and your deck is about to become the center of backyard gatherings, quiet morning coffees, and lively evening barbecues. But before you set up the grill and drag out the patio furniture, it is worth taking a closer look at the boards beneath your feet. Sun, rain, and heavy foot traffic can take a real toll on outdoor wood and composite materials, and the warm months are exactly when small issues turn into costly problems. With a few proactive steps, you can keep your outdoor space safe, beautiful, and ready for every event on your calendar.
Why Summer Deck Maintenance Matters
Your deck endures more abuse than almost any other part of your home. It faces constant UV exposure, dramatic temperature swings, and occasional downpours, all while supporting the weight of people, furniture, and planters. Over time, these stresses cause the wood to dry, crack, and splinter, or they can weaken the fasteners and joists that hold the structure together. Even if you have a composite deck that resists rot and insects, the underlying frame is still vulnerable, and the surface can fade or develop mildew in humid climates.
Taking time in early summer to inspect and refresh your deck is not just about curb appeal. It is about preventing safety hazards like loose railings or protruding nails, and it is about protecting your investment so you do not face a full replacement earlier than necessary. Deck repairs, when caught early, are almost always less expensive than waiting until boards rot through or the entire structure becomes unstable. A weekend of focused work now can save you thousands of dollars later, and it keeps your outdoor living space enjoyable all season long.
Step 1: Perform a Thorough Deck Inspection
Before you grab a sander or a can of sealant, you need to know what you are working with. A careful inspection helps you separate simple cosmetic issues from structural problems that require professional attention. Walk the entire surface slowly, looking for warning signs that indicate hidden damage or imminent failure.
Start with the obvious areas: check for cracked, split, or warped boards, and note any spots where the wood feels spongy or soft underfoot. These are classic signs of rot, which often begins where moisture gets trapped, such as around fastener heads, between boards, or near the ground. Next, examine the railings and balusters. Push on them firmly from different angles to confirm they do not wobble or give way. Loose railings are a major safety concern, especially for homes with children or elderly visitors.
Then, move underneath the deck if you have access. Look for signs of water damage, insect activity, or corroded metal connectors. Pay attention to the posts that support the deck and the beams they attach to. Any vertical cracks or signs of decay in these load-bearing components are serious and should be evaluated by a professional immediately. Also, check the ledger board, which is the part that attaches the deck to your house. This is a common failure point, and if you see gaps, rust, or deteriorated flashing, you need to address it without delay.
What to Look for in Specific Deck Materials
Different decking materials require slightly different inspection priorities. If you have a pressure-treated wood deck, focus on moisture damage and insect infestations. Use a flathead screwdriver to gently probe any suspicious dark or soft spots. If the screwdriver sinks in easily, the wood has lost its integrity and needs to be replaced. For cedar or redwood decks, watch for surface checking and splitting, which can accelerate when protective finishes wear away.
For composite decking, inspect the surface for deep scratches, fading, or mold growth. While composites do not rot, they can become brittle and crack over time, especially in areas with intense sunlight. Check that the hidden fasteners are still secure and that no boards have started to lift or shift. Regardless of the material, if you find any issues that make you question the stability of the deck, it is wise to consult a qualified contractor. You can find one through a reputable directory like HVAC contractors for seasonal maintenance if you need help with related home systems, but for deck-specific concerns, look for a deck builder or a structural inspector.
Step 2: Clean Your Deck Thoroughly
Once you have completed your inspection and noted any required repairs, the next task is cleaning. A clean surface is essential for any protective coating to adhere properly, and it also removes the dirt, pollen, and mildew that can make a deck look tired and worn. For most decks, a simple cleaning with a stiff brush and a deck-specific cleaner is all you need. You can rent a pressure washer for bigger jobs, but use it with caution. Too much pressure can gouge wood fibers and force water into the joints, which leads to the very damage you are trying to prevent.
If you are using a pressure washer, keep the nozzle moving and hold it at least 12 inches away from the surface. Start with a low-pressure setting and test it on an inconspicuous area first. For composite decks, never use a pressure washer with more than 1,500 PSI, and avoid using metal attachments that can scratch the surface. A gentler approach is often safer: use a deck cleaner, a soft-bristle brush, and a garden hose to scrub away grime. This method is particularly effective for mildew and algae, which thrive in shaded, damp areas of the deck.
After cleaning, allow the deck to dry completely. This may take a day or two, depending on the weather and the amount of shade your deck receives. A dry surface is critical before you move on to sanding or applying any finish. Moisture trapped under a sealant will cause it to blister and peel, and it can also promote rot from the inside out.
Step 3: Make Necessary Repairs
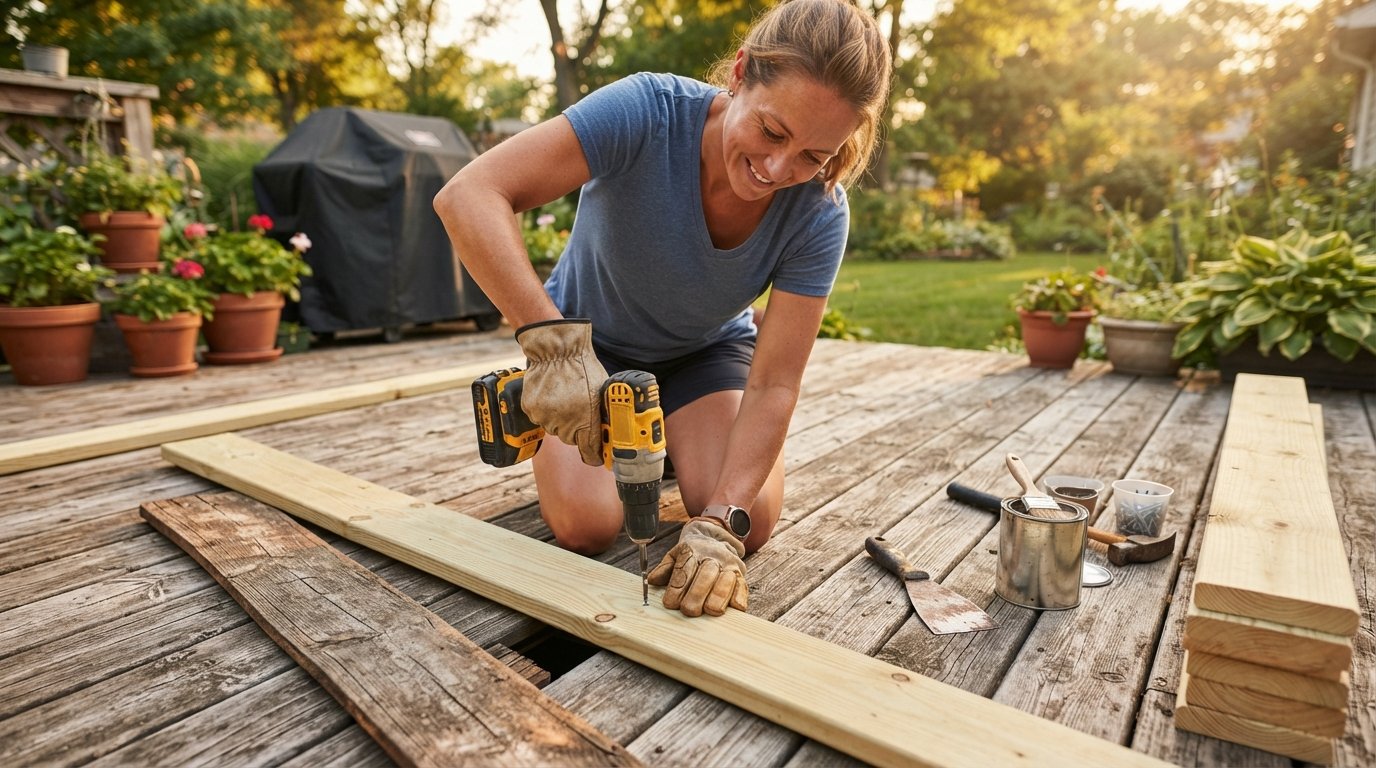
Now that your deck is clean and dry, it is time to fix the issues you found during your inspection. Start with the fasteners. Walk the deck with a drill and a box of galvanized or stainless steel screws. Replace any popped nails or screws, and add new ones to secure boards that have started to lift. Use a countersink bit so the screw heads sit just below the surface of the wood, which prevents them from catching on bare feet or sandal straps.
Next, address any damaged or rotting boards. If only a few boards are affected, you can often replace them individually. Carefully remove the old board, checking the framing underneath for any signs of moisture damage. Cut the new board to size, treat the ends with a wood preservative, and secure it with the appropriate fasteners. For composite boards, follow the manufacturer's instructions for replacement, as the fastening system may differ from wood decks. It is a good idea to keep a few spare boards in a dry place after your deck is built; this makes future repairs much easier, even if the original product has been discontinued.
Also, inspect all railings, stairs, and posts. Tighten any loose bolts or lag screws, and replace any connectors that show signs of rust or corrosion. If you find that a post or a section of railing is rotted or unstable, it is best to replace the entire component rather than trying to patch it. The safety of your family and guests is not worth compromising for the sake of a quick fix.
Step 4: Sand and Smooth the Surface
After repairs are complete, sanding is an important step, especially for wood decks. Over time, the wood fibers can splinter and lift, creating rough patches that are uncomfortable to walk on and that snag clothing. Sanding smooths these areas and also opens up the wood pores so that a new coat of stain or sealant can penetrate deeply for better protection.
For most decks, an orbital sander with 60 to 80 grit paper is sufficient for the floor surface. For railings and balusters, you may need to sand by hand or use a detail sander to reach the tight spaces. If your deck has old paint or a thick layer of stain that is peeling, you may need to use a chemical stripper before sanding. This is a more labor-intensive process, but it is essential for achieving a clean, even surface. Always wear a dust mask and safety glasses when sanding, and be sure to sweep away all the dust after you finish. You want a clean surface before applying any finish.
Step 5: Apply a Protective Finish
Now that your deck is clean, repaired, and smooth, it is time to protect it from the elements. The right finish will not only enhance the natural beauty of the wood but also repel water, block UV rays, and prevent cracking and mildew growth. There are several types of finishes to choose from, and your choice will depend on the look you want and the amount of maintenance you are willing to do.
- Clear sealers: These provide minimal color change and offer basic water repellency. They are easy to apply but tend to wear off quickly, often requiring reapplication every year.
- Semi-transparent stains: These add a subtle tint to the wood while still allowing the grain to show. They offer better UV protection than clear sealers and typically last two to three years.
- Solid stains: These provide a more opaque color, hiding the wood grain entirely. They offer the most UV protection and can last up to five years, but they can peel or blister if applied over an old finish.
For composite decks, you do not need to apply a stain or sealer, but you may want to use a specialized composite cleaner and protectant to restore color and prevent fading. Always follow the manufacturer's recommendations for your specific decking material.
Apply the finish on a dry day with mild temperatures, ideally between 50 and 80 degrees Fahrenheit. Use a brush, roller, or sprayer, and work in sections, applying an even coat along the length of the boards. Be careful not to leave puddles or heavy spots, as these will dry unevenly. Most finishes require two coats, so be sure to allow the first coat to dry completely before applying the second.
Seasonal Deck Care Tips for the Rest of Summer
Your work is not done once the finish is dry. To keep your deck in top condition through the rest of the summer, you need to adopt a few simple habits. Sweep the deck regularly to remove leaves, dirt, and debris that can trap moisture and promote mildew growth. If you have potted plants, be sure to lift them occasionally to allow the area underneath to dry, and consider using plant stands to improve airflow.
After heavy rain, check for standing water, especially in low spots or between boards. If you notice water pooling, it may indicate that the deck has settled or that there are drainage issues that need to be addressed. Also, be mindful of what you place on the deck. Grill drips, oil-based products, and even certain types of patio furniture can leave stains. Use a grill mat and furniture pads to minimize direct contact between the surface and potential sources of damage.
Finally, keep an eye on the finish. If you notice water soaking into the wood instead of beading up on the surface, it is time to reapply a fresh coat of sealer. This is a normal part of deck maintenance, and catching it early will prevent the wood from drying out and cracking. For more complex projects or if you are short on time, you can always hire a professional deck contractor to handle the job. To ensure you get a reliable expert, you can use a platform like USremodel to connect with vetted professionals in your area. They can provide estimates and help you plan the work so that your deck remains a safe and inviting space for years to come.
By following these summer deck maintenance and repair tips, you are not just keeping your deck looking good for the current season. You are extending its lifespan, enhancing your home's value, and ensuring that every summer gathering is a safe and enjoyable one. A little effort now pays off with a beautiful, durable outdoor space that you and your family will love for many summers ahead.
Learn more about Deck or Porch Repair for guides, costs, and what to expect.
Compare Deck or Porch Repair Pros Near You
Enter your ZIP code to compare top-rated local professionals and request free quotes.